Overview
The Vendor Management system lets you track and manage all vendors for a market in one place. Review applications, update statuses, assign booths, collect payments, message vendors, and keep notes — all from the vendor management table on your market’s management page.Accessing Vendor Management
Open your market’s management page and scroll to the vendor table: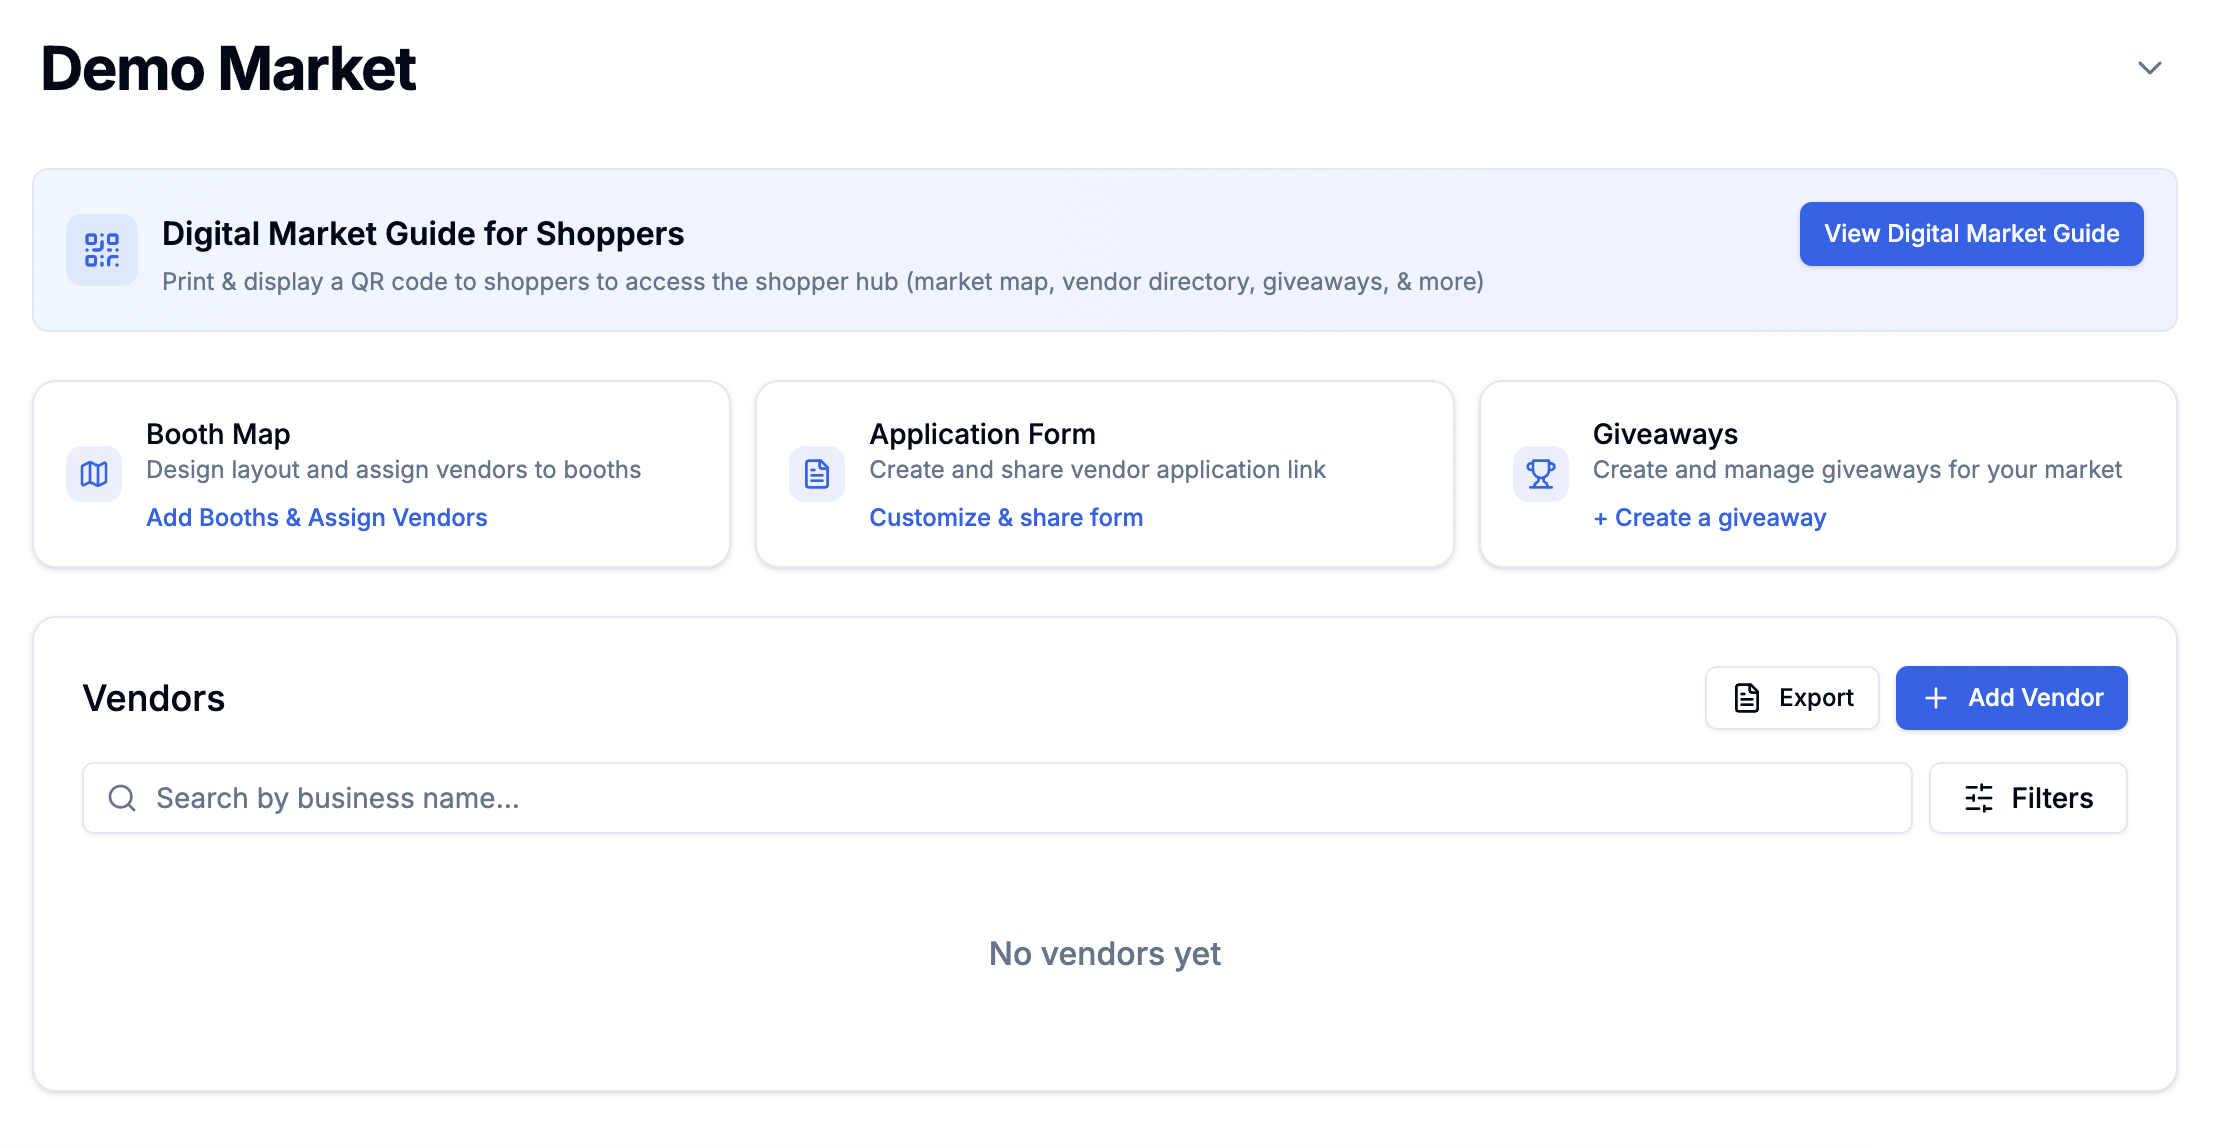
Market Management Page - The vendor management table is at the bottom
The Vendor Table
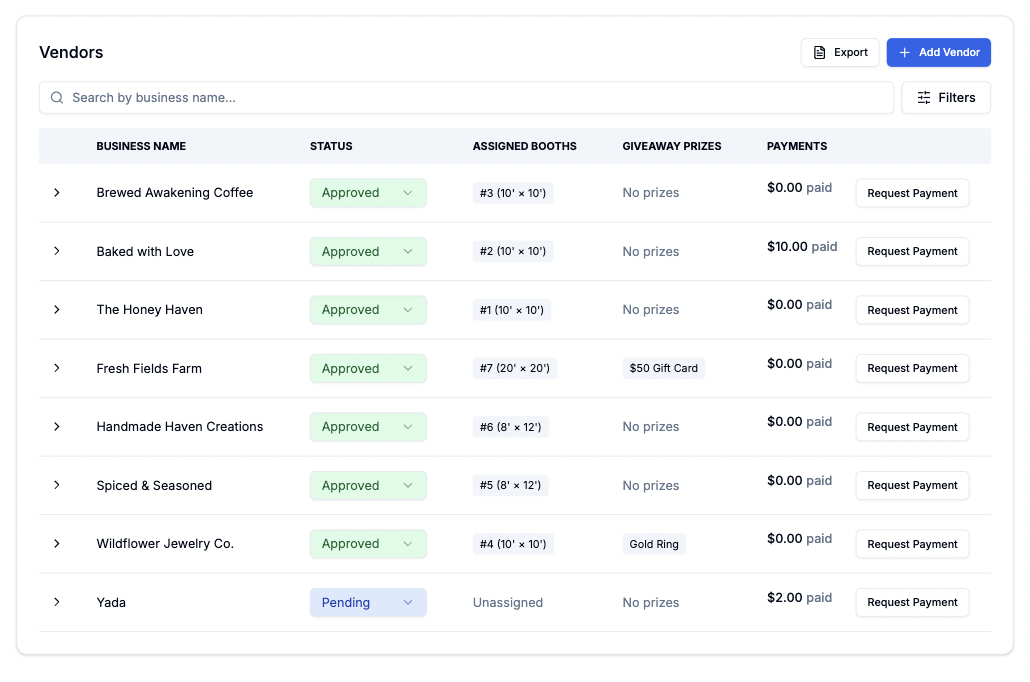
Vendor Management Table
Adding Vendors
Through the Application Form (recommended)
Vendors apply through your market’s application form link. Their submissions appear automatically in the table. See Vendor Application Form for setup details.Import from Previous Markets
Import vendors from other markets you’ve managed:- Click Import Vendors.
- Select the market to import from.
- Standard vendor info is transferred (name, contact, etc.). Custom question responses are not imported.
Add Manually
Click Add Vendor to manually add a vendor by entering their details. The vendor receives a welcome email with a link to create their account.Vendor Status
Set each vendor’s status:Vendors automatically receive an email notification when you change their
status. You can customize these email templates at Settings → Email
Preferences & Templates.
Viewing Vendor Details
Expand any vendor row to see:- Application responses — all form answers including custom questions.
- Payment history — pending, paid, and failed payments.
- Booth assignment — current booth or option to assign one.
- Giveaway prize contributions — what the vendor offered for giveaways.
- Notes — internal notes visible only to your team (see below).
Booth Assignment
From the expanded vendor row, assign a booth:- Click Assign booth.
- Select from available booths on your map.
- Save — the vendor’s name appears on the booth in the map designer and the Digital Market Guide.
Payment Management
Requesting Payment
- Click Request Payment for a vendor.
- Enter the amount and a description (e.g. “Booth Fee — 10x10 Space”).
- Submit — the vendor receives an email with a secure Stripe checkout link.
Recording Manual Payments
If a vendor paid outside of Stripe (cash, check, etc.):- Click Record Payment (or add a manual payment).
- Enter the amount and description.
- Mark as paid — this updates the vendor’s payment status without going through Stripe.
Payment Statuses
- Pending — payment requested, not yet paid.
- Paid — payment completed (Stripe or manual).
- Failed — payment attempt failed.
- Refunded — payment was refunded.
- Cancelled — payment request was cancelled by the host.
Notes
Vendor Notes
Add internal notes to any vendor — visible only to your team. Use them to track conversations, special requirements, or reminders.- Expand the vendor row.
- Go to the Notes section.
- Add, edit, or delete notes.
Market Notes
Add market-level notes that are shared across your team — visible from the market management page. Use these for logistics, planning, or anything about the event itself (as opposed to a specific vendor). Market notes are separate from vendor notes. Both are only visible to your team.Direct Messaging
Message vendors directly from the table:- Click the DM / message icon on a vendor row.
- Opens a direct message thread for that market.
- Vendors see and reply to messages in their portal and the mobile app.
Booth Selection Settings
Control whether vendors can pick their own booths:- On the market management page, find Booth Selection Settings.
- Enable or disable vendor self-selection.
- Set an optional hold time for reservations.
Exporting Data
Export your vendor list as a CSV for offline use, reporting, or importing into other tools. Click the Export button above the table.Best Practices
Review Applications Promptly
Review Applications Promptly
Vendors are waiting to hear back. Quick reviews improve their experience
and your market’s reputation. Use the status filters to focus on pending
applications.
Use DMs for Quick Questions
Use DMs for Quick Questions
Instead of email back-and-forth, use the built-in DM to ask a vendor a
quick question about their application or setup needs.
Keep Notes
Keep Notes
Add notes about vendor conversations, special requirements, or past issues.
Your team can see these when reviewing the vendor in the future.
Frequently Asked Questions
Do vendors get notified of status changes?
Do vendors get notified of status changes?
Yes. Vendors receive an email whenever you change their status. You can
customize these templates in Settings → Email Preferences.
Can I import vendors from another market?
Can I import vendors from another market?
Yes. Use Import Vendors and select the source market. Standard info is
copied; custom question responses are not.
What if a vendor paid outside Stripe?
What if a vendor paid outside Stripe?
Use the manual payment option to record the payment. It updates the
vendor’s status without requiring Stripe checkout.
Next Steps
Vendor Applications
Set up and customize your application form
Payment Processing
Set up Stripe and manage payments
Booth Map
Design your layout and assign booths