Overview
Seen Markets uses Stripe to process vendor payments. Hosts connect Stripe, then collect booth fees, request custom payments, or let vendors pay when they select a booth. Funds go directly to your connected Stripe account.Seen Markets charges a 2% processing fee on top of Stripe’s standard
fees on Free and Pro plans. Pro Plus and Pro Concierge plans enjoy
0% platform fees. You can optionally pass the fee to vendors.
Setting Up Payments
Step 1: Connect Stripe
Go to seenmarkets.com/settings/payments (or use the Getting started checklist in the mobile app).- Create a new Stripe account — complete the Stripe Connect onboarding with your business info and payout details.
- Or connect an existing account — log in to your Stripe account and authorize the connection.
Step 2: Configure Settings
Once connected:- Platform fee pass-through — choose whether the 2% Seen Markets fee is absorbed by you or passed to vendors.
- Brand your payment experience — at dashboard.stripe.com/settings/branding, add your logo and brand colors.
- Configure receipts — at dashboard.stripe.com/settings/emails, customize receipt emails.
Three Ways to Collect Payment
1. Request Payment (most common)
From the vendor management table on your market page: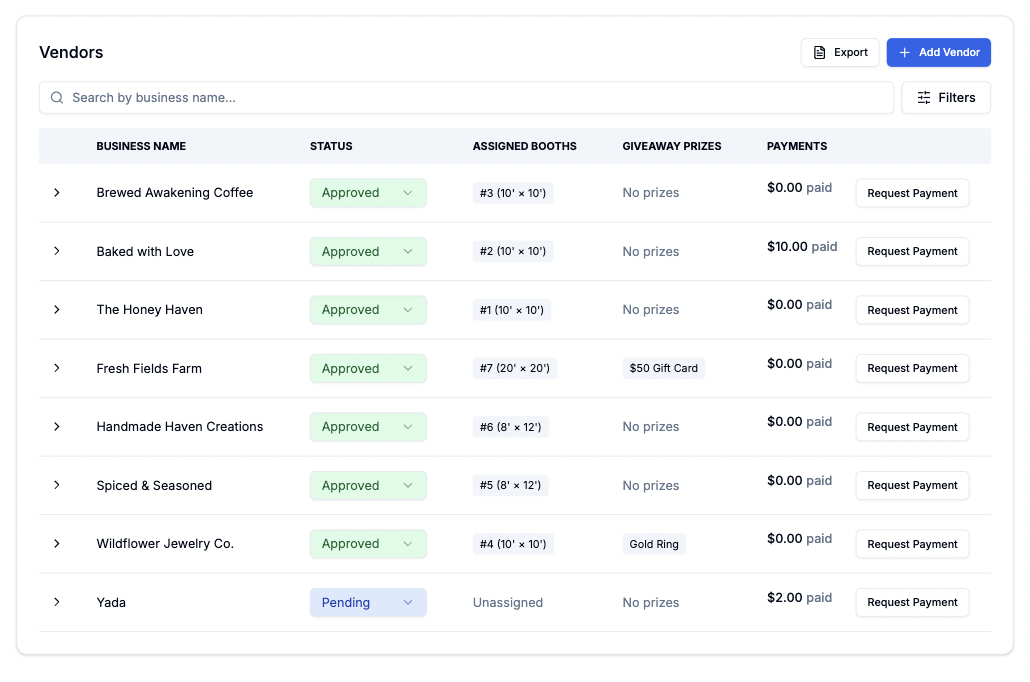
Vendor Management Table - Request and track payments
- Expand a vendor row.
- Click Request Payment.
- Enter the amount and description (e.g. “Booth Fee — 10x10 Space”).
- Submit.
2. Booth Selection Checkout
When you enable vendor booth self-selection and set prices on booths:- Approved vendors see the booth map and available booths with prices.
- Vendor selects a booth → goes to Stripe checkout.
- After payment, the booth is assigned automatically.
3. Record a Manual Payment
If a vendor paid outside Stripe (cash, check, Venmo, etc.):- Expand the vendor row in the vendor management table.
- Click Record Payment (manual).
- Enter the amount and description.
- Mark as paid.
Managing Payments
Track all payments in the vendor management table:- Pending — payment requested, waiting for vendor to pay.
- Paid — payment completed (Stripe or manual).
- Failed — Stripe payment attempt failed.
- Refunded — payment was refunded.
- Cancelled — host cancelled the payment request.
Actions
- Cancel a pending payment request.
- Resend the payment link if a vendor lost the email.
- View transaction details and history per vendor.
Where Vendors Pay
- Email — vendors receive a link to a Stripe checkout page.
- Mobile app — pending payments appear on the vendor’s Schedule tab with a “Pay Now” button.
- Vendor portal (web) — pending payments are visible on the dashboard.
Best Practices
Setup
Setup
- Complete all Stripe verification steps before your first market.
- Configure branding so checkout pages look professional.
- Decide upfront whether to pass the platform fee to vendors.
Collection
Collection
- Send payment requests promptly after approving vendors.
- Include clear descriptions so vendors know what they’re paying for.
- Follow up on pending payments before the market date.
- Use booth self-selection with pricing for hands-off collection.
Tracking
Tracking
- Check payment status regularly in the vendor table.
- Record manual payments so your records are complete.
- Export vendor data for your own bookkeeping.
Frequently Asked Questions
When do I receive funds?
When do I receive funds?
Funds are available in your Stripe account within 2–7 business days,
depending on your Stripe payout schedule.
What are the fees?
What are the fees?
Seen Markets charges 2% on top of Stripe’s standard processing fees on
Free and Pro plans (0% on Pro Plus and Pro Concierge). You can pass the
platform fee to vendors in your payment settings.
Is it secure?
Is it secure?
All payments are processed through Stripe’s PCI-compliant platform. Seen
Markets never handles sensitive payment information.
What if a vendor paid with cash?
What if a vendor paid with cash?
Use the manual payment option to record it. This keeps your vendor records
accurate without requiring Stripe checkout.
Next Steps
Vendor Management
Manage vendor payments from the vendor table
Booth Map
Set booth prices and enable self-selection
Email Notifications
Learn about payment notification emails