> ## Documentation Index
> Fetch the complete documentation index at: https://guides.seenmarkets.com/llms.txt
> Use this file to discover all available pages before exploring further.
# Vendor Management
> Efficiently manage your market vendors from application to attendance
## Overview
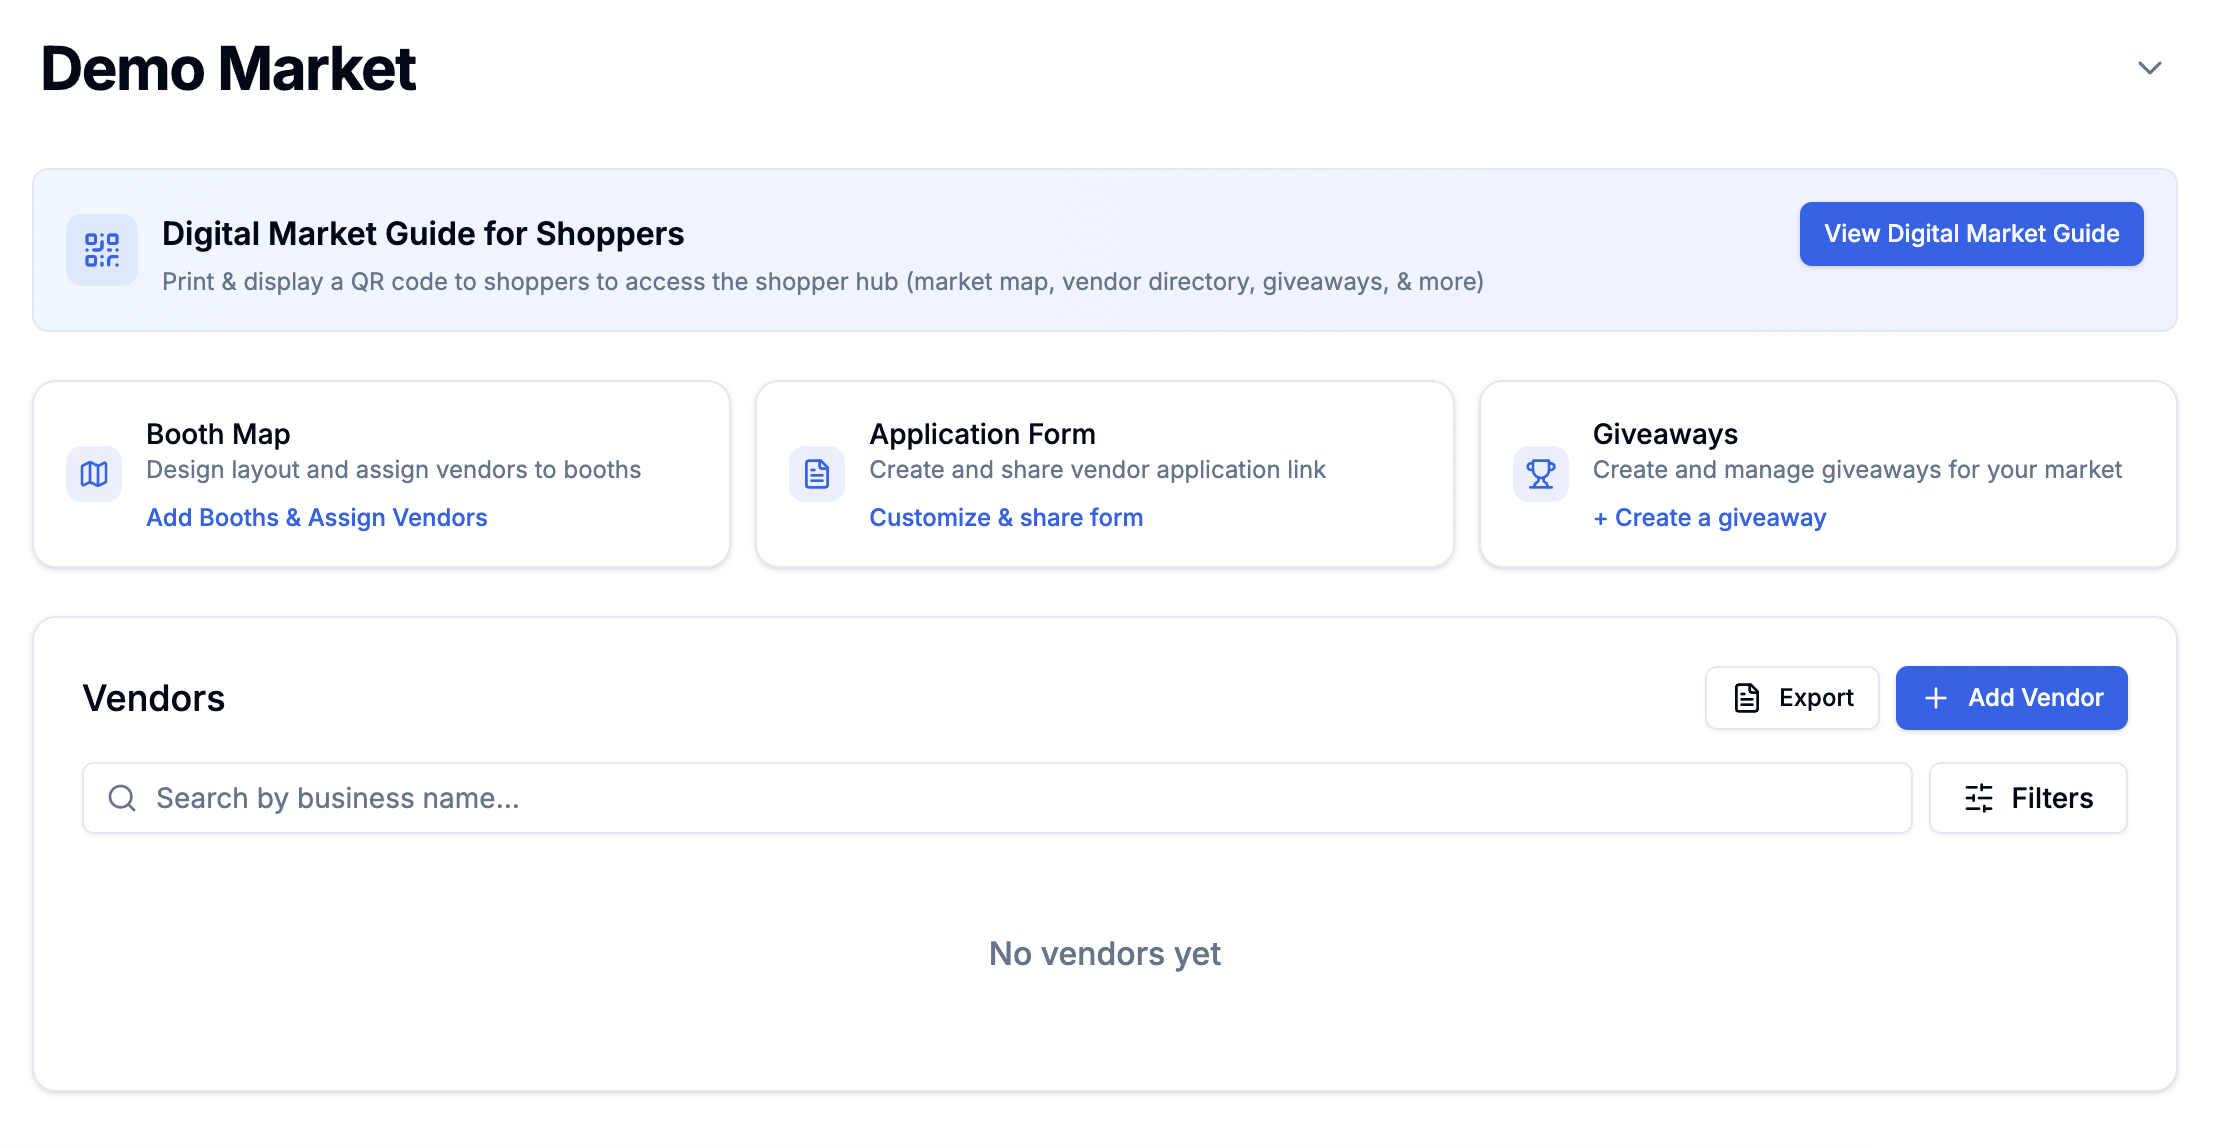
The Vendor Management system lets you track and manage all vendors for a market in one place. Review applications, update statuses, assign booths, collect payments, message vendors, and keep notes — all from the vendor management table on your market's management page.
## Accessing Vendor Management
Open your market's management page and scroll to the vendor table:
 ## The Vendor Table
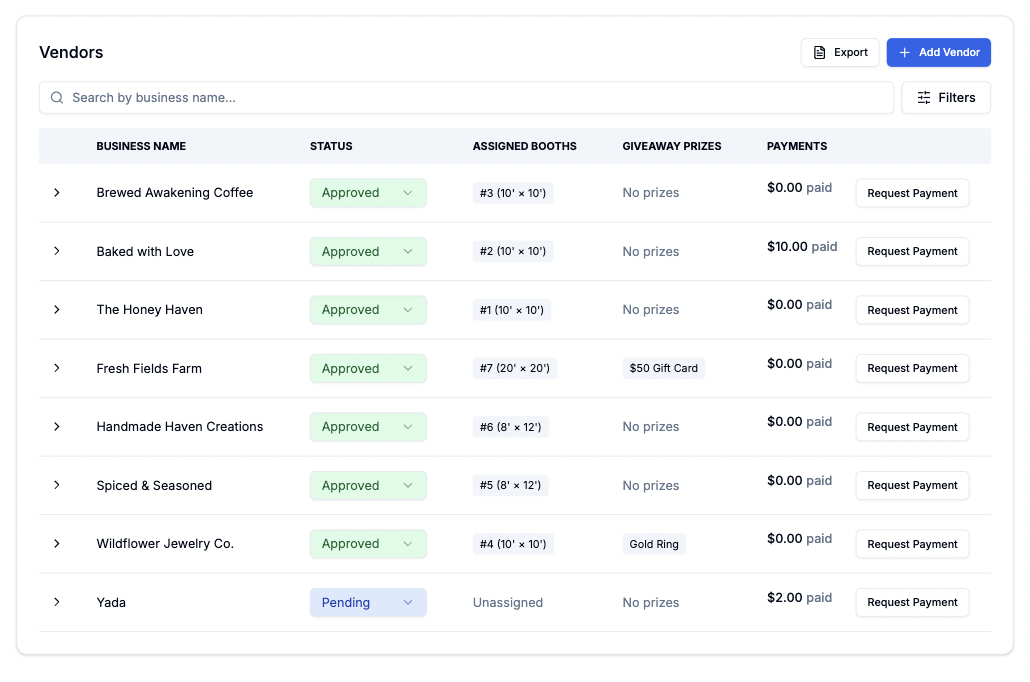 Each row shows a vendor with their status, booth assignment, and payment info. Expand a row to see full details.
## Adding Vendors
### Through the Application Form (recommended)
Vendors apply through your market's application form link. Their submissions appear automatically in the table. See [Vendor Application Form](/essentials/vendor-applications) for setup details.
### Import from Previous Markets
Import vendors from other markets you've managed:
1. Click **Import Vendors**.
2. Select the market to import from.
3. Standard vendor info is transferred (name, contact, etc.). Custom question responses are not imported.
### Add Manually
Click **Add Vendor** to manually add a vendor by entering their details. The vendor receives a welcome email with a link to create their account.
## Vendor Status
Set each vendor's status:
| Status | Meaning |
| -------------- | ---------------------------------- |
| **Pending** | Default. Waiting for your review. |
| **Approved** | Accepted to the market. |
| **Denied** | Not accepted. |
| **Waitlisted** | On the list if a spot opens. |
| **Cancelled** | Vendor withdrew or host cancelled. |
Vendors automatically receive an email notification when you change their
status. You can customize these email templates at Settings → Email
Preferences & Templates.
## Viewing Vendor Details
Expand any vendor row to see:
* **Application responses** — all form answers including custom questions.
* **Payment history** — pending, paid, and failed payments.
* **Booth assignment** — current booth or option to assign one.
* **Giveaway prize contributions** — what the vendor offered for giveaways.
* **Notes** — internal notes visible only to your team (see below).
## Booth Assignment
From the expanded vendor row, assign a booth:
1. Click **Assign booth**.
2. Select from available booths on your map.
3. Save — the vendor's name appears on the booth in the map designer and the Digital Market Guide.
For vendor self-selection (where vendors pick their own booth), see [Booth Map → Vendor Booth Self-Selection](/essentials/booth-map#vendor-booth-self-selection).
## Payment Management
### Requesting Payment
1. Click **Request Payment** for a vendor.
2. Enter the amount and a description (e.g. "Booth Fee — 10x10 Space").
3. Submit — the vendor receives an email with a secure Stripe checkout link.
### Recording Manual Payments
If a vendor paid outside of Stripe (cash, check, etc.):
1. Click **Record Payment** (or add a manual payment).
2. Enter the amount and description.
3. Mark as paid — this updates the vendor's payment status without going through Stripe.
### Payment Statuses
* **Pending** — payment requested, not yet paid.
* **Paid** — payment completed (Stripe or manual).
* **Failed** — payment attempt failed.
* **Refunded** — payment was refunded.
* **Cancelled** — payment request was cancelled by the host.
## Notes
### Vendor Notes
Add **internal notes** to any vendor — visible only to your team. Use them to track conversations, special requirements, or reminders.
1. Expand the vendor row.
2. Go to the **Notes** section.
3. Add, edit, or delete notes.
### Market Notes
Add **market-level notes** that are shared across your team — visible from the market management page. Use these for logistics, planning, or anything about the event itself (as opposed to a specific vendor).
Market notes are separate from vendor notes. Both are only visible to your team.
## Direct Messaging
Message vendors directly from the table:
* Click the **DM / message** icon on a vendor row.
* Opens a direct message thread for that market.
* Vendors see and reply to messages in their portal and the mobile app.
You can also access all DM threads from the Messages page.
## Booth Selection Settings
Control whether vendors can pick their own booths:
1. On the market management page, find **Booth Selection Settings**.
2. Enable or disable vendor self-selection.
3. Set an optional **hold time** for reservations.
When enabled, approved vendors see the booth map and can reserve a booth. Paid booths require Stripe checkout.
## Exporting Data
Export your vendor list as a **CSV** for offline use, reporting, or importing into other tools. Click the **Export** button above the table.
## Best Practices
Vendors are waiting to hear back. Quick reviews improve their experience
and your market's reputation. Use the status filters to focus on pending
applications.
Instead of email back-and-forth, use the built-in DM to ask a vendor a
quick question about their application or setup needs.
Add notes about vendor conversations, special requirements, or past issues.
Your team can see these when reviewing the vendor in the future.
## Frequently Asked Questions
Yes. Vendors receive an email whenever you change their status. You can
customize these templates in Settings → Email Preferences.
Yes. Use Import Vendors and select the source market. Standard info is
copied; custom question responses are not.
Use the manual payment option to record the payment. It updates the
vendor's status without requiring Stripe checkout.
## Next Steps
Set up and customize your application form
Set up Stripe and manage payments
Design your layout and assign booths
Each row shows a vendor with their status, booth assignment, and payment info. Expand a row to see full details.
## Adding Vendors
### Through the Application Form (recommended)
Vendors apply through your market's application form link. Their submissions appear automatically in the table. See [Vendor Application Form](/essentials/vendor-applications) for setup details.
### Import from Previous Markets
Import vendors from other markets you've managed:
1. Click **Import Vendors**.
2. Select the market to import from.
3. Standard vendor info is transferred (name, contact, etc.). Custom question responses are not imported.
### Add Manually
Click **Add Vendor** to manually add a vendor by entering their details. The vendor receives a welcome email with a link to create their account.
## Vendor Status
Set each vendor's status:
| Status | Meaning |
| -------------- | ---------------------------------- |
| **Pending** | Default. Waiting for your review. |
| **Approved** | Accepted to the market. |
| **Denied** | Not accepted. |
| **Waitlisted** | On the list if a spot opens. |
| **Cancelled** | Vendor withdrew or host cancelled. |
Vendors automatically receive an email notification when you change their
status. You can customize these email templates at Settings → Email
Preferences & Templates.
## Viewing Vendor Details
Expand any vendor row to see:
* **Application responses** — all form answers including custom questions.
* **Payment history** — pending, paid, and failed payments.
* **Booth assignment** — current booth or option to assign one.
* **Giveaway prize contributions** — what the vendor offered for giveaways.
* **Notes** — internal notes visible only to your team (see below).
## Booth Assignment
From the expanded vendor row, assign a booth:
1. Click **Assign booth**.
2. Select from available booths on your map.
3. Save — the vendor's name appears on the booth in the map designer and the Digital Market Guide.
For vendor self-selection (where vendors pick their own booth), see [Booth Map → Vendor Booth Self-Selection](/essentials/booth-map#vendor-booth-self-selection).
## Payment Management
### Requesting Payment
1. Click **Request Payment** for a vendor.
2. Enter the amount and a description (e.g. "Booth Fee — 10x10 Space").
3. Submit — the vendor receives an email with a secure Stripe checkout link.
### Recording Manual Payments
If a vendor paid outside of Stripe (cash, check, etc.):
1. Click **Record Payment** (or add a manual payment).
2. Enter the amount and description.
3. Mark as paid — this updates the vendor's payment status without going through Stripe.
### Payment Statuses
* **Pending** — payment requested, not yet paid.
* **Paid** — payment completed (Stripe or manual).
* **Failed** — payment attempt failed.
* **Refunded** — payment was refunded.
* **Cancelled** — payment request was cancelled by the host.
## Notes
### Vendor Notes
Add **internal notes** to any vendor — visible only to your team. Use them to track conversations, special requirements, or reminders.
1. Expand the vendor row.
2. Go to the **Notes** section.
3. Add, edit, or delete notes.
### Market Notes
Add **market-level notes** that are shared across your team — visible from the market management page. Use these for logistics, planning, or anything about the event itself (as opposed to a specific vendor).
Market notes are separate from vendor notes. Both are only visible to your team.
## Direct Messaging
Message vendors directly from the table:
* Click the **DM / message** icon on a vendor row.
* Opens a direct message thread for that market.
* Vendors see and reply to messages in their portal and the mobile app.
You can also access all DM threads from the Messages page.
## Booth Selection Settings
Control whether vendors can pick their own booths:
1. On the market management page, find **Booth Selection Settings**.
2. Enable or disable vendor self-selection.
3. Set an optional **hold time** for reservations.
When enabled, approved vendors see the booth map and can reserve a booth. Paid booths require Stripe checkout.
## Exporting Data
Export your vendor list as a **CSV** for offline use, reporting, or importing into other tools. Click the **Export** button above the table.
## Best Practices
Vendors are waiting to hear back. Quick reviews improve their experience
and your market's reputation. Use the status filters to focus on pending
applications.
Instead of email back-and-forth, use the built-in DM to ask a vendor a
quick question about their application or setup needs.
Add notes about vendor conversations, special requirements, or past issues.
Your team can see these when reviewing the vendor in the future.
## Frequently Asked Questions
Yes. Vendors receive an email whenever you change their status. You can
customize these templates in Settings → Email Preferences.
Yes. Use Import Vendors and select the source market. Standard info is
copied; custom question responses are not.
Use the manual payment option to record the payment. It updates the
vendor's status without requiring Stripe checkout.
## Next Steps
Set up and customize your application form
Set up Stripe and manage payments
Design your layout and assign booths