> ## Documentation Index
> Fetch the complete documentation index at: https://guides.seenmarkets.com/llms.txt
> Use this file to discover all available pages before exploring further.
# Booth Map Designer
> Create and manage your market's interactive booth layout
## Overview
The Booth Map Designer is a drag-and-drop canvas where you create your market's layout. Place booths, add landmarks, upload a background image of your venue, and assign vendors to specific booth spaces. The finished map appears in the Digital Market Guide for shoppers.
## Accessing the Designer
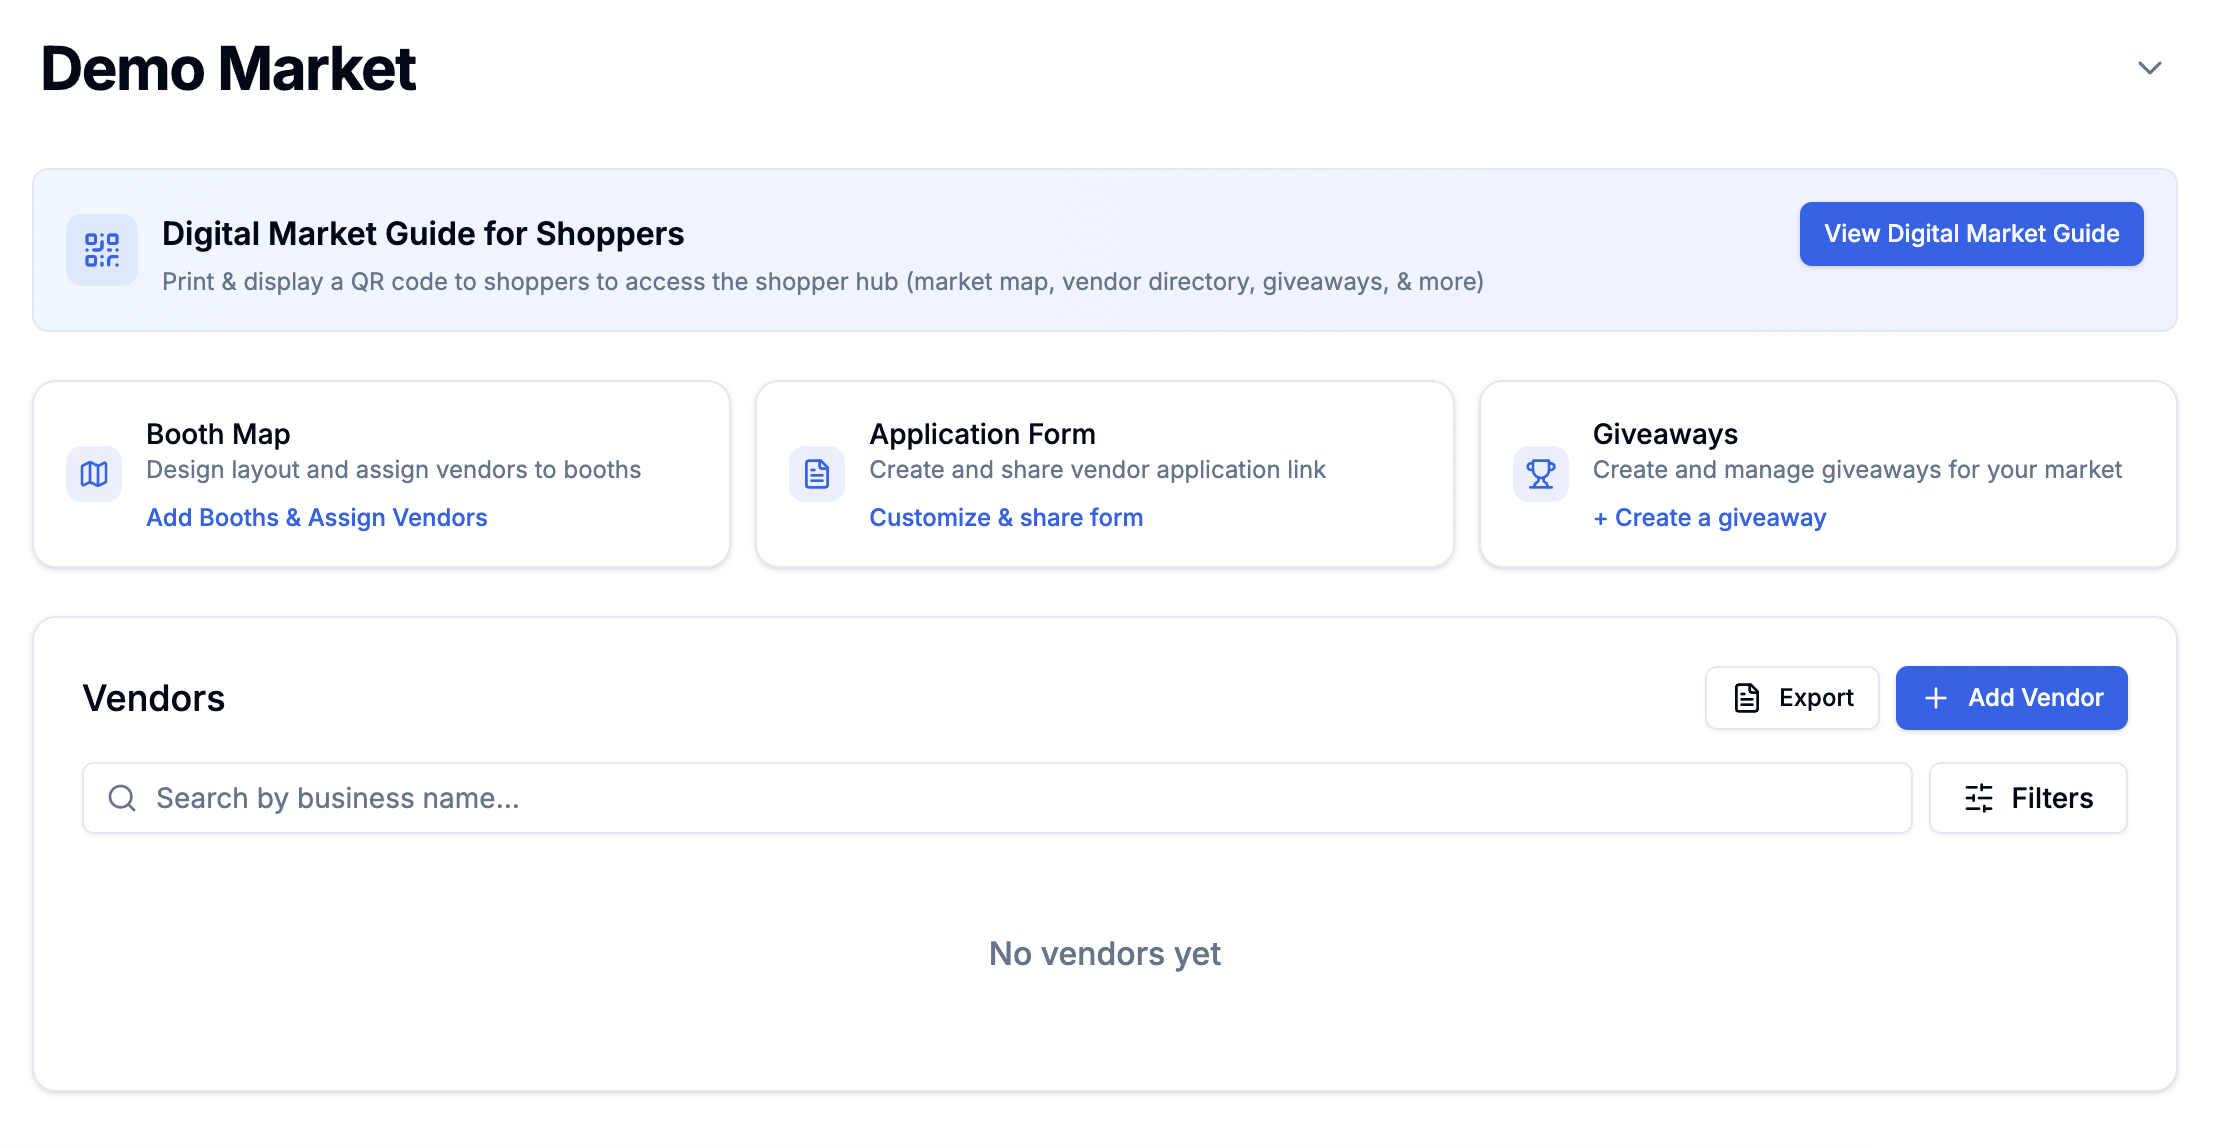
Open your market's management page and click the **Booth Map** card.
 ## Creating Your Layout
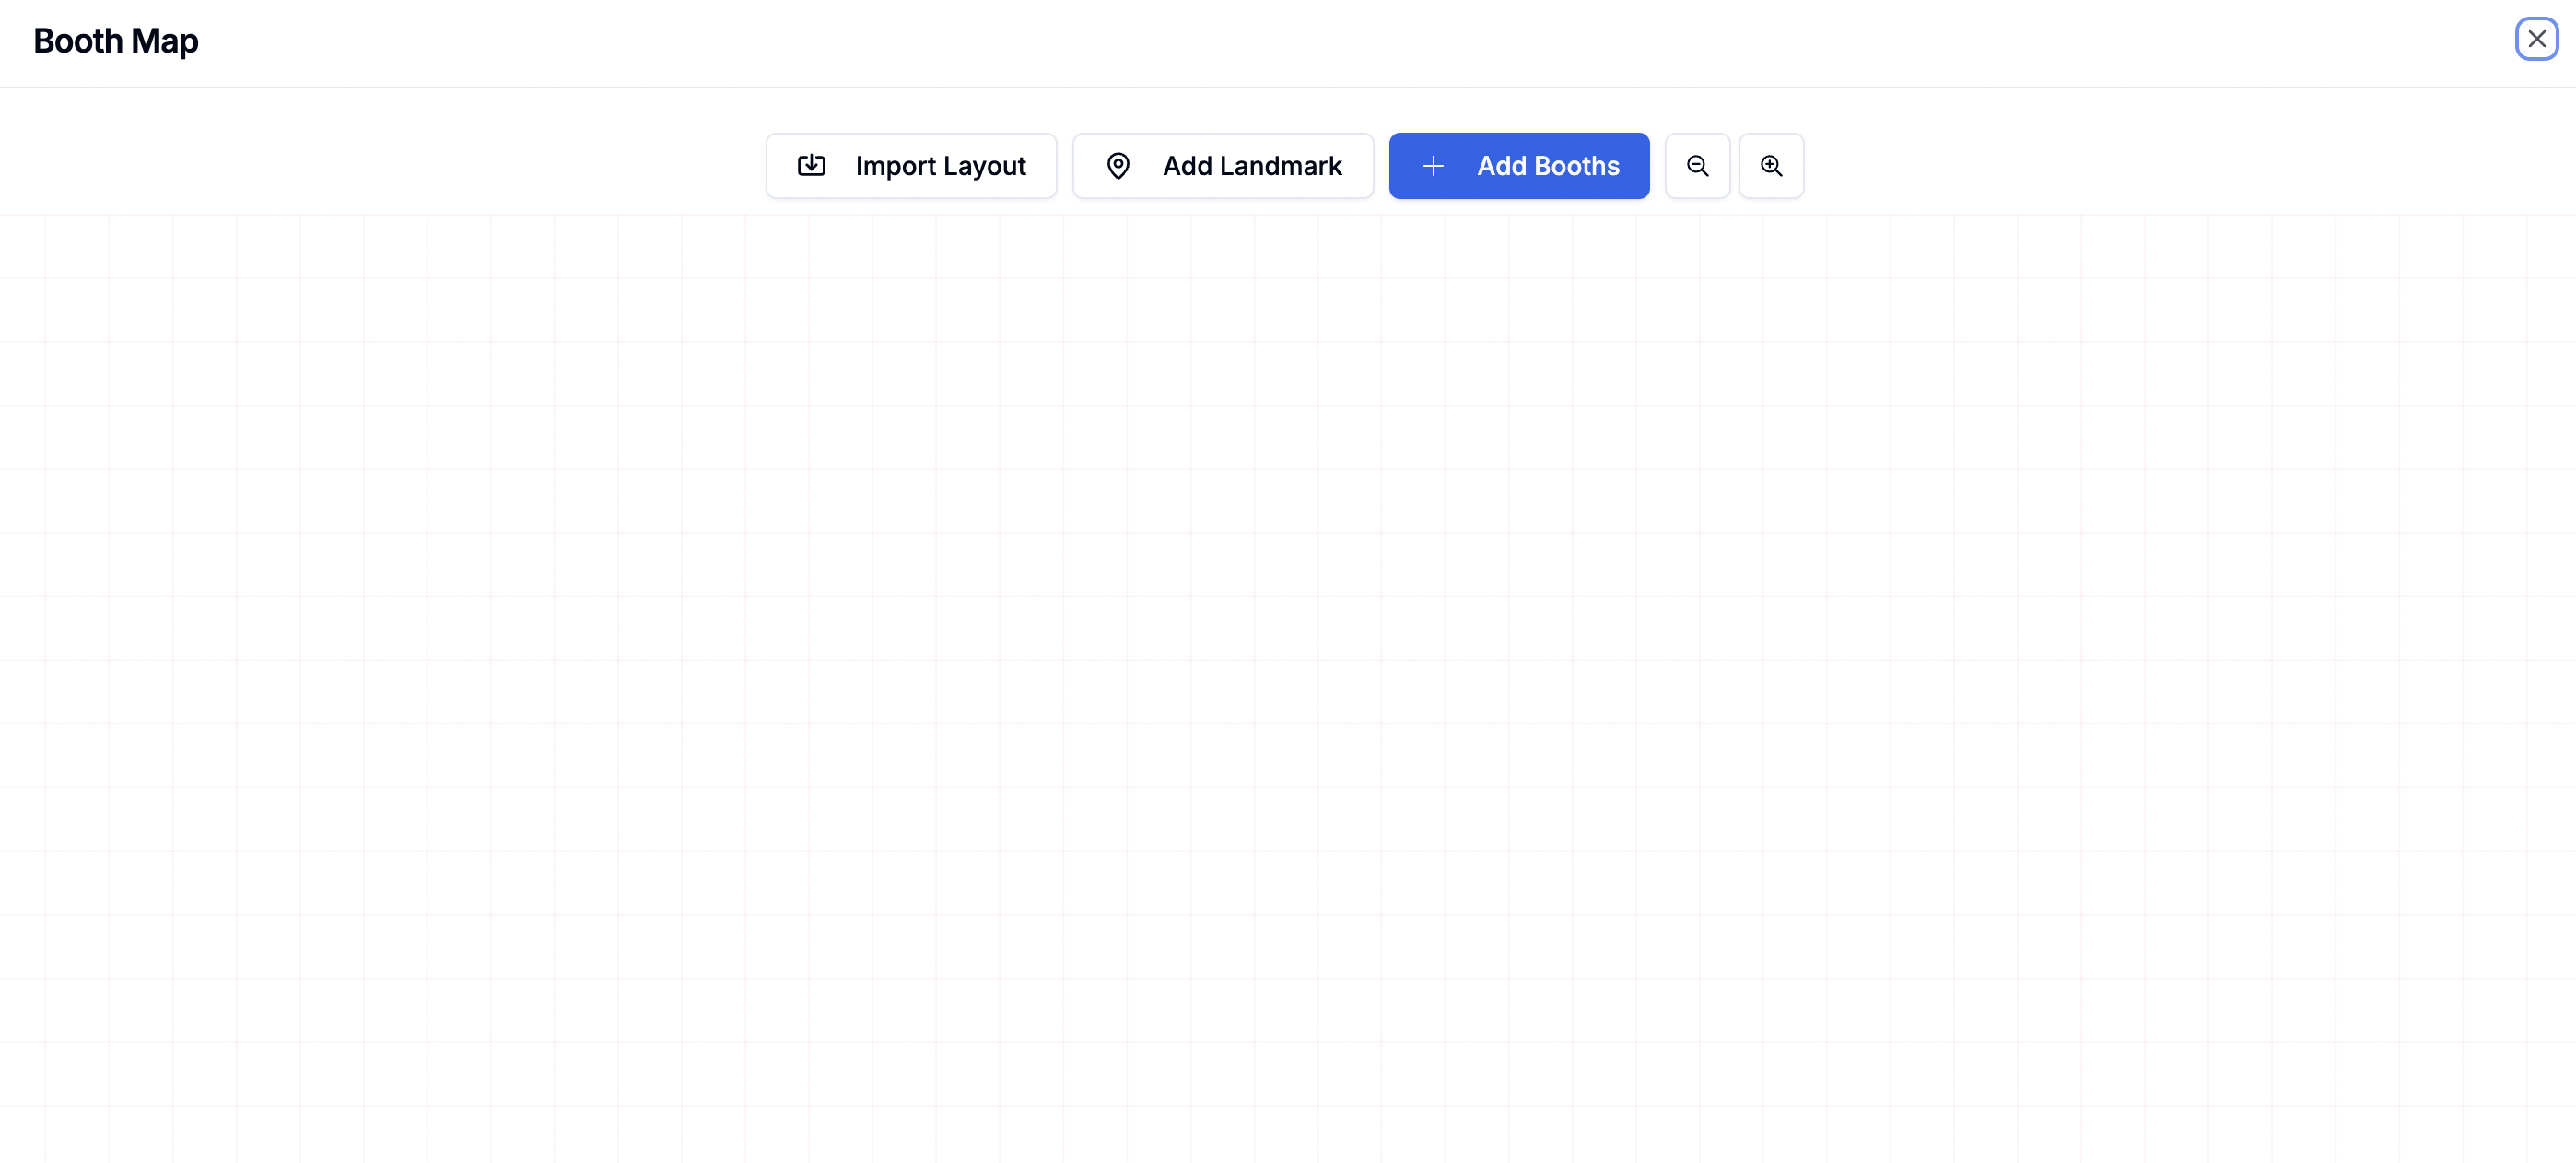
When you first open the designer, you'll see an empty canvas:
## Creating Your Layout
When you first open the designer, you'll see an empty canvas:
 ### Upload a Background Image
Upload a floor plan, aerial photo, or venue diagram to use as a reference layer behind your booths:
1. Click the **Background** option in the designer toolbar.
2. Upload your image.
3. Position, resize, and adjust the **opacity** so booths are easy to see on top.
### Upload a Background Image
Upload a floor plan, aerial photo, or venue diagram to use as a reference layer behind your booths:
1. Click the **Background** option in the designer toolbar.
2. Upload your image.
3. Position, resize, and adjust the **opacity** so booths are easy to see on top.
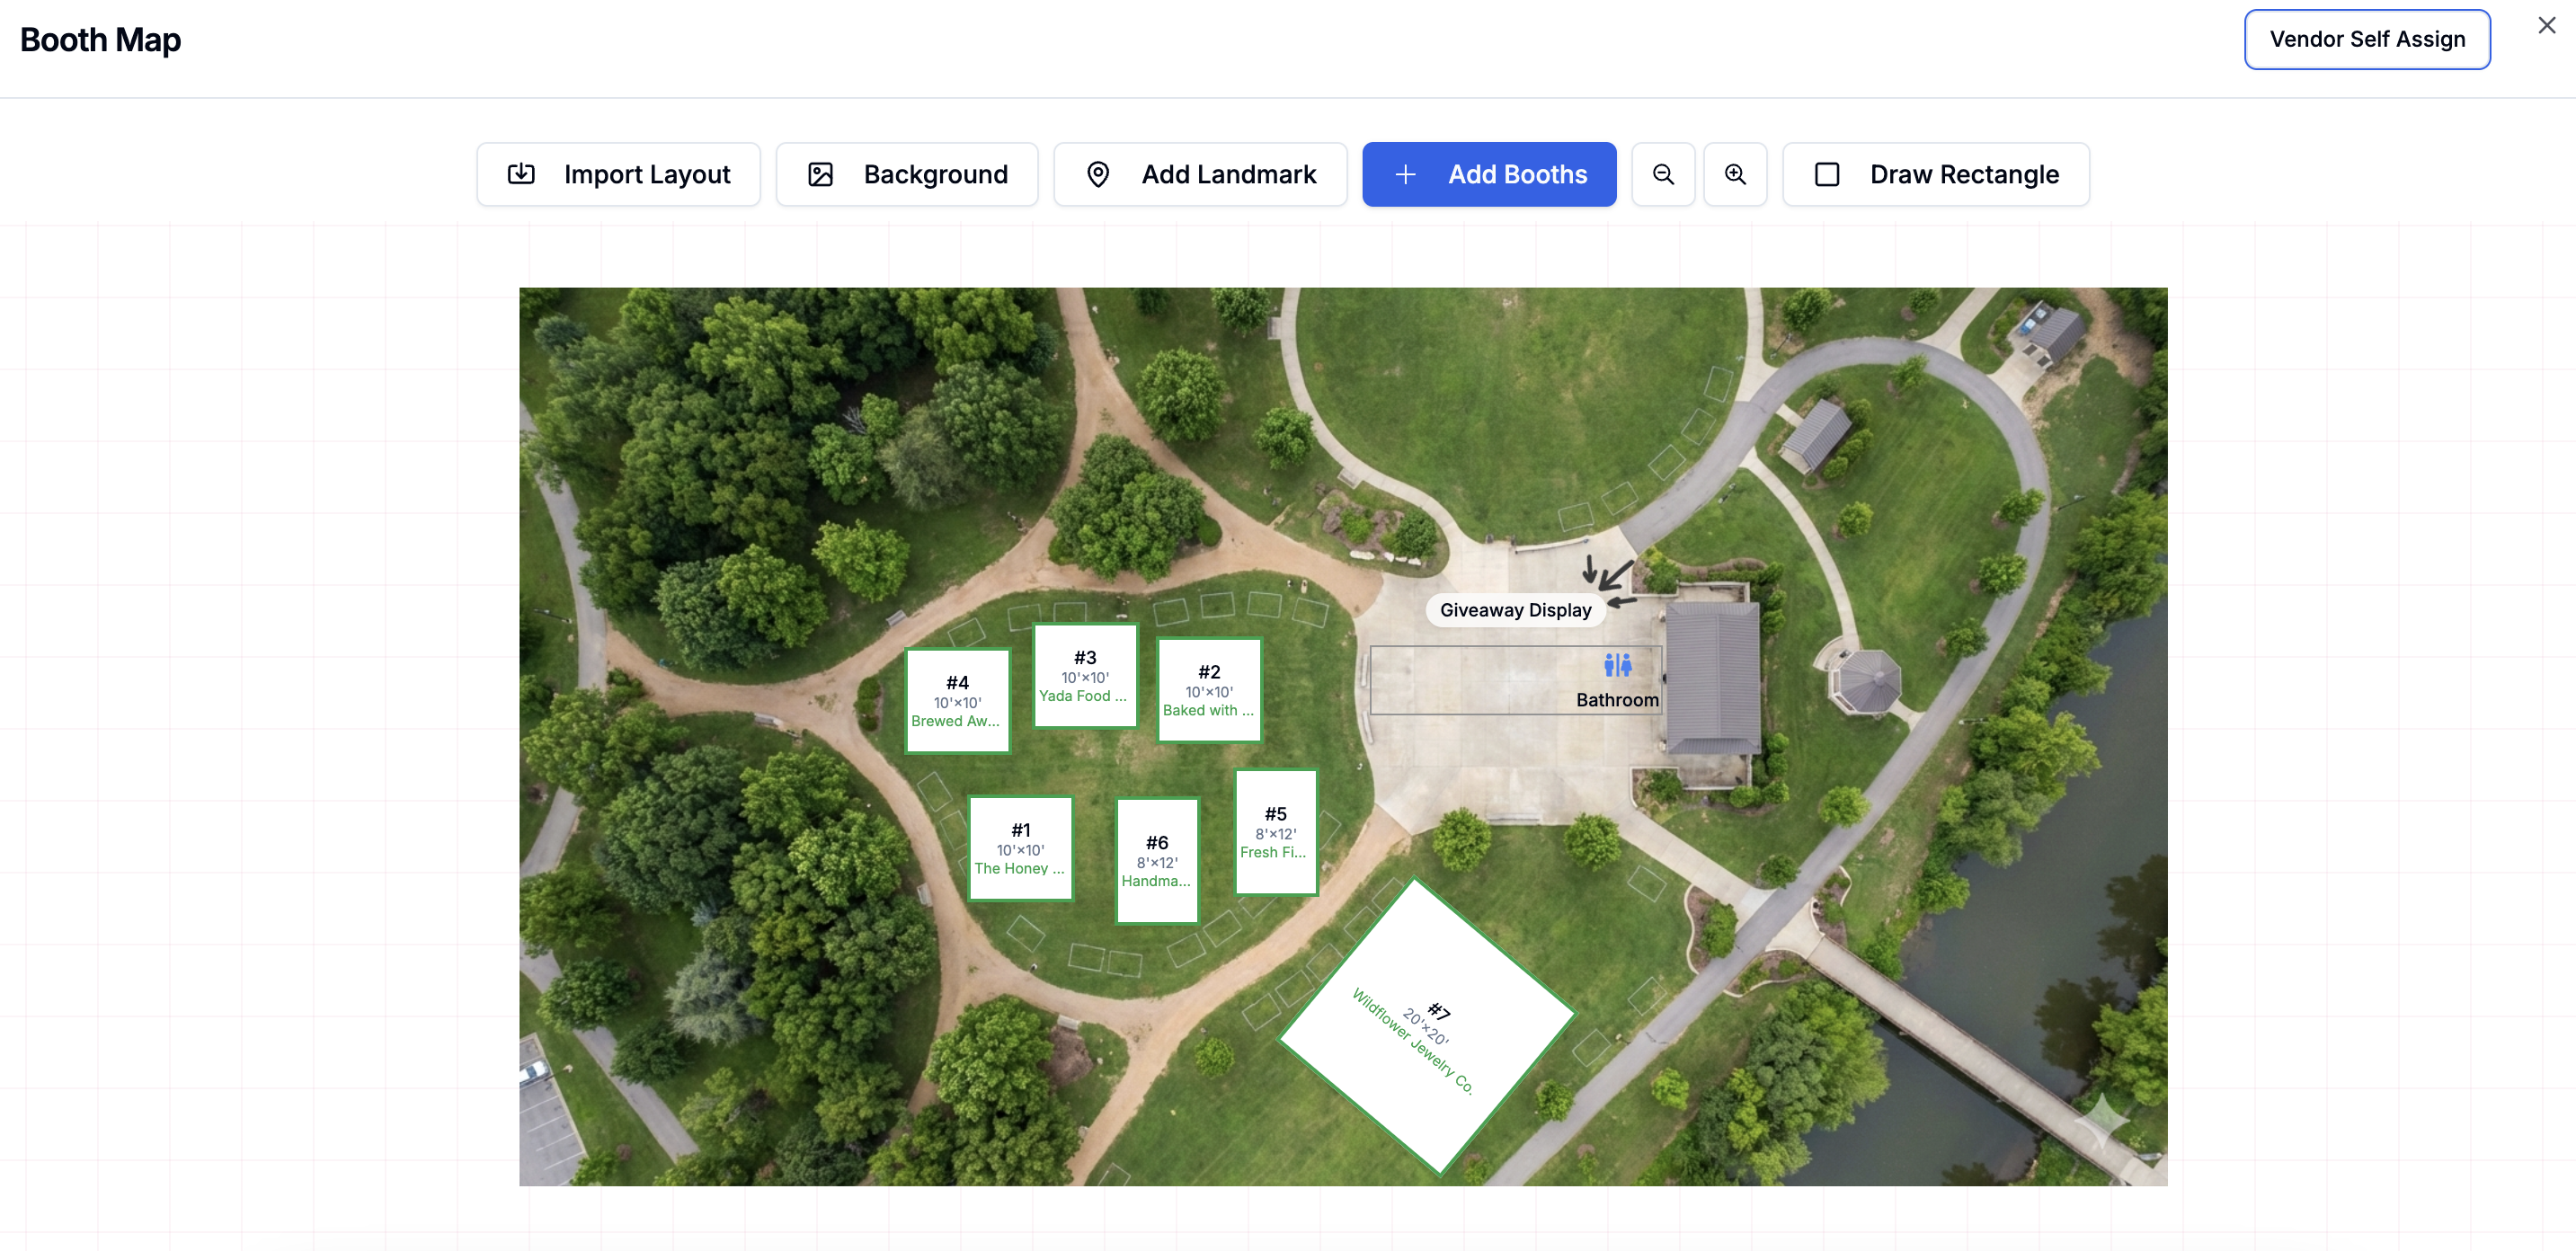 This helps you match your digital layout to the real-world venue.
### Import an Existing Layout
If you've already designed a layout for a previous market:
1. Click **Import Layout**.
2. Select the market to copy from.
3. Booths, landmarks, and the background image transfer to your current market.
### Adding Booths
Click **Add Booths** to open the booth creation dialog:
This helps you match your digital layout to the real-world venue.
### Import an Existing Layout
If you've already designed a layout for a previous market:
1. Click **Import Layout**.
2. Select the market to copy from.
3. Booths, landmarks, and the background image transfer to your current market.
### Adding Booths
Click **Add Booths** to open the booth creation dialog:
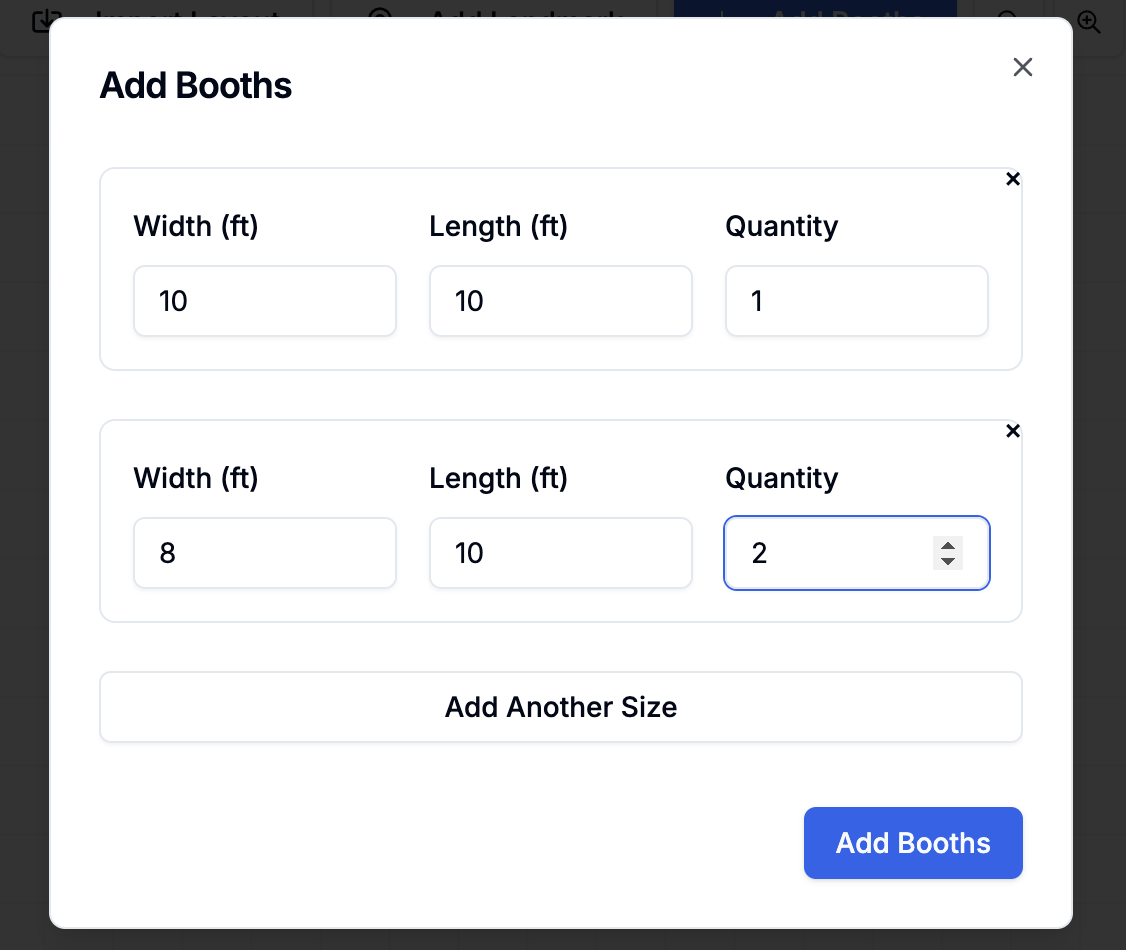 Enter:
* **Width** and **height** (in feet)
* **Number of booths** to create
* Optional: **price per booth**
Booths appear on the canvas. Drag and drop them to position. You can:
* **Rename** each booth (e.g. "A1", "B3")
* **Rotate** booths to match your venue
* **Resize** individual booths
* **Duplicate** a booth
* **Set or change the price**
* **Remove** a booth
### Adding Landmarks
Use landmarks to mark important locations:
1. Click **Add Landmark**.
2. Choose a type: Entrance, Exit, Bathrooms, Doors, Power outlets, Food, Parking, or Custom (your own label).
3. Place the landmark on the canvas.
### Scale
Adjust the **scale** setting (`boothPixelsPerFoot`, range 2–30) to control how booth dimensions translate to the canvas. This lets you fit your layout to the actual size of your venue.
## Assigning Vendors to Booths
Click any booth on the canvas to see management options:
Enter:
* **Width** and **height** (in feet)
* **Number of booths** to create
* Optional: **price per booth**
Booths appear on the canvas. Drag and drop them to position. You can:
* **Rename** each booth (e.g. "A1", "B3")
* **Rotate** booths to match your venue
* **Resize** individual booths
* **Duplicate** a booth
* **Set or change the price**
* **Remove** a booth
### Adding Landmarks
Use landmarks to mark important locations:
1. Click **Add Landmark**.
2. Choose a type: Entrance, Exit, Bathrooms, Doors, Power outlets, Food, Parking, or Custom (your own label).
3. Place the landmark on the canvas.
### Scale
Adjust the **scale** setting (`boothPixelsPerFoot`, range 2–30) to control how booth dimensions translate to the canvas. This lets you fit your layout to the actual size of your venue.
## Assigning Vendors to Booths
Click any booth on the canvas to see management options:
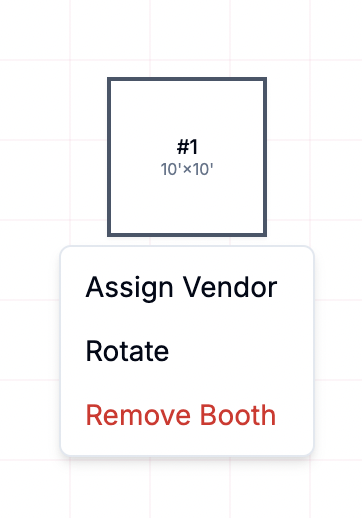 * **Assign vendor** — select from your approved vendors. The vendor's name appears on the booth.
* **Rotate** — change booth orientation.
* **Remove** — delete the booth.
Assigned booths appear green in the designer to help you track which spaces
are taken. This color is only visible in the designer, not in the public
Digital Market Guide.
You can also assign booths from the **Vendor management** table on the market page — expand a vendor row and assign a booth from there.
## Booth Pricing
Set a **price on individual booths** when you create them or by editing an existing booth. Prices are used when vendor booth self-selection is enabled (see below).
## Vendor Booth Self-Selection
Let approved vendors **pick their own booth** instead of assigning them manually:
1. On your market's management page, click **Vendor Self Assign** button in the top right.
2. Enable booth self-selection.
### How it works for vendors
* Approved vendors see the booth map and available booths.
* **Free booths:** vendor selects → confirms → booth is assigned.
* **Paid booths:** vendor selects → goes to Stripe checkout → booth is assigned after payment.
* If a vendor doesn't complete checkout within the hold time, the reservation expires and the booth becomes available again.
## Best Practices
* Upload a background image of your venue first so you can match the digital layout to reality.
* Start with landmarks to establish reference points.
* Group similar booth sizes together.
* Leave adequate space for foot traffic.
* Use consistent naming (A1, A2, B1, B2…) so vendors know where to go.
* Create clear aisles and pathways.
* Place similar vendors near each other.
* Consider power outlet access when placing booths.
* Check booth dimensions match vendor needs.
* Verify vendor assignments before publishing.
* Review the layout from the shopper's perspective in the Digital Market Guide preview.
* Use Import Layout to reuse your design for recurring dates.
## Frequently Asked Questions
Yes. Add, remove, or move booths and landmarks at any time. Changes
automatically update in the Digital Market Guide.
Yes. Use **Import Layout** to copy from another market. If you use **Add
another date** (duplicate market), the booth map is copied automatically.
Vendors see their assigned booth in the vendor portal, the mobile app, and
the Digital Market Guide. If booth self-selection is enabled, they can pick
their own booth from the map.
Set a price on a booth. When self-selection is enabled, vendors pay via
Stripe at checkout. You can also manually request payment from the vendor
management table.
## Next Steps
Preview how shoppers will see your layout
Manage vendor booth assignments
Order booth number signs and market maps
* **Assign vendor** — select from your approved vendors. The vendor's name appears on the booth.
* **Rotate** — change booth orientation.
* **Remove** — delete the booth.
Assigned booths appear green in the designer to help you track which spaces
are taken. This color is only visible in the designer, not in the public
Digital Market Guide.
You can also assign booths from the **Vendor management** table on the market page — expand a vendor row and assign a booth from there.
## Booth Pricing
Set a **price on individual booths** when you create them or by editing an existing booth. Prices are used when vendor booth self-selection is enabled (see below).
## Vendor Booth Self-Selection
Let approved vendors **pick their own booth** instead of assigning them manually:
1. On your market's management page, click **Vendor Self Assign** button in the top right.
2. Enable booth self-selection.
### How it works for vendors
* Approved vendors see the booth map and available booths.
* **Free booths:** vendor selects → confirms → booth is assigned.
* **Paid booths:** vendor selects → goes to Stripe checkout → booth is assigned after payment.
* If a vendor doesn't complete checkout within the hold time, the reservation expires and the booth becomes available again.
## Best Practices
* Upload a background image of your venue first so you can match the digital layout to reality.
* Start with landmarks to establish reference points.
* Group similar booth sizes together.
* Leave adequate space for foot traffic.
* Use consistent naming (A1, A2, B1, B2…) so vendors know where to go.
* Create clear aisles and pathways.
* Place similar vendors near each other.
* Consider power outlet access when placing booths.
* Check booth dimensions match vendor needs.
* Verify vendor assignments before publishing.
* Review the layout from the shopper's perspective in the Digital Market Guide preview.
* Use Import Layout to reuse your design for recurring dates.
## Frequently Asked Questions
Yes. Add, remove, or move booths and landmarks at any time. Changes
automatically update in the Digital Market Guide.
Yes. Use **Import Layout** to copy from another market. If you use **Add
another date** (duplicate market), the booth map is copied automatically.
Vendors see their assigned booth in the vendor portal, the mobile app, and
the Digital Market Guide. If booth self-selection is enabled, they can pick
their own booth from the map.
Set a price on a booth. When self-selection is enabled, vendors pay via
Stripe at checkout. You can also manually request payment from the vendor
management table.
## Next Steps
Preview how shoppers will see your layout
Manage vendor booth assignments
Order booth number signs and market maps